This article discuss about how to install xcache on linux servers :
What is Xcache module ?
XCache is a fast, stable PHP opcode cacher that has been tested and is now running on production servers under high load. It supports all most all the version of php but we recommend to install it the latest versions for bug free. Installing Xcache on high traffic web servers will optimizes performance by removing the compilation time of PHP scripts by caching the compiled state of PHP scripts into the shm (RAM) and uses the compiled version straight from the RAM. This will increase the rate of page generation time by up to 5 times as it also optimizes many other aspects of php scripts and reduce server load. You can find more information here
Installing Xcache
Downloading xcache from source :
SSH your server as root.
- # cd /usr/src
- # wget http://xcache.lighttpd.net/pub/Releases/<select the latest version available>
- # tar -zxvf xcache-1.3.0.tar.gz
- # cd xcache-1.3.0
Compile and install xcache from source
Use phpize command to prepare xcache as a PHP extension for compiling:
- # phpize
- # ./configure –enable-xcache
- # make
- # make install
The default xcache.so location should be /usr/local/lib/php/extensions/no-debug-non-zts-XXXX/ in cpanel.
Add the xcache configuration to the php.ini file
- php -i | grep php.ini
- Configuration File (php.ini) Path => /usr/local/lib
- Loaded Configuration File => /usr/local/lib/php.ini
Edit the php.ini file and append the following line at the end of the file :
- # vi /usr/local/lib/php.ini
[xcache-common]
; change me – 64 bit php => /usr/lib64/php/modules/xcache.so
; 32 bit php => /usr/lib/php/modules/xcache.so
zend_extension = /usr/lib64/php/modules/xcache.so[xcache.admin]
xcache.admin.auth = On
xcache.admin.user = “mOo”
; xcache.admin.pass = md5($your_password)
xcache.admin.pass = “”[xcache]
xcache.shm_scheme = “mmap”
xcache.size = 32M
xcache.count = 1
xcache.slots = 8K
xcache.ttl = 3600
xcache.gc_interval = 300; Same as aboves but for variable cache
; If you don’t know for sure that you need this, you probably don’t
xcache.var_size = 0M
xcache.var_count = 1
xcache.var_slots = 8K
xcache.var_ttl = 0
xcache.var_maxttl = 0
xcache.var_gc_interval = 300; N/A for /dev/zero
xcache.readonly_protection = Offxcache.mmap_path = “/dev/zero”
xcache.cacher = On
xcache.stat = On
Restart your Apache web server:
- # service httpd restart
To make sure that xcache is working properly type the following command
- # php -v
PHP 5.2.13 (cli) (built: Jun 20 2010 18:13:45)
Copyright (c) 1997-2010 The PHP Group
Zend Engine v2.2.0, Copyright (c) 1998-2010 Zend Technologies
with eAccelerator v0.9.6, Copyright (c) 2004-2010 eAccelerator, by eAccelerator
with the ionCube PHP Loader v3.3.14, Copyright (c) 2002-2010, by ionCube Ltd., and
with Zend Optimizer v3.3.9, Copyright (c) 1998-2009, by Zend Technologies
with XCache v1.3.0-rc1, Copyright (c) 2005-2009, by mOo
with Suhosin v0.9.29, Copyright (c) 2007, by SektionEins GmbH
if you are able to see the line ” with XCache v1.3.0-rc1, Copyright (c) 2005-2009, by mOo ” then you have installed it successfully.
Next we will see how to install the xcache admin interface to manage xcache via the admin interface, clearing caches etc.
Installing xcache admin interface
By default the admin-page is protected by http-auth, it is disabled if you haven’t yet set a password. The user/pass of http-auth
can be set in php.ini (see PhpIni). But you have to md5(your password) first. Setup a php page with webserver.
<?php
echo md5(“password”);
?>
request it from browser and get 5f4dcc3b5aa765d61d8327deb882cf99. So update php.ini:
- php -i | grep php.ini
vi /usr/local/lib/php.ini
xcache.admin.user = “mOo”
xcache.admin.pass = “5f4dcc3b5aa765d61d8327deb882cf99”
mv /usr/src/xcache-1.3.0/admin /usr/local/apache/htdocs
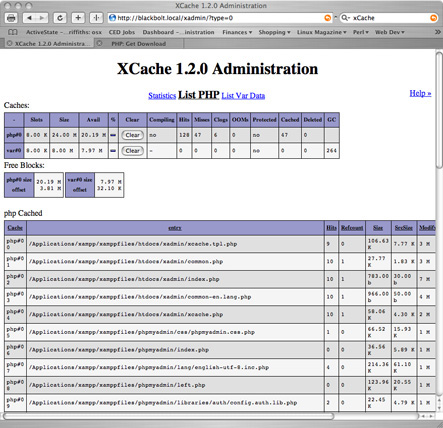
And then try http://<serverip>/xcache/
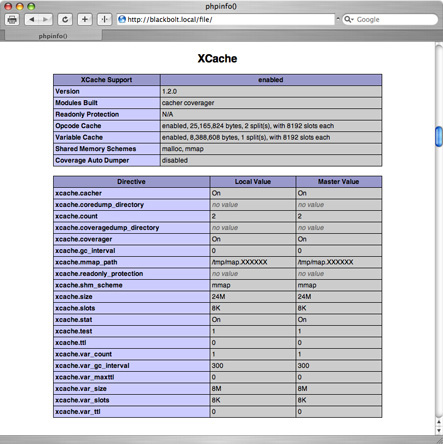
You should be able to get the following home page to manage the xache :
-
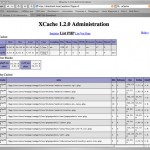
- xcache admin page
-
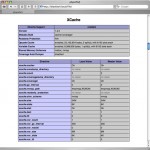
- xcache php.ini