This tutorial shows how to install and configure the WebDAV module on Apache 2.x & Apache 2.2.x running on CentOS / FEDORA
Why WebDAV ?
WebDAV stands for “Web-based Distributed Authoring and Versioning” which helps the web administrator to share the files/folder over the HTTP protocol, it works very similar like the other file sharing software like SMB(samba) and NFS but the only difference is you can access the share any ware in any part of the world via HTTP where with SMB and NFS it is not possible. The only concern using the module is the speed over HTTP which may not be equivalent to the smb and nfs.
Pre-requisites
Mod_dav – This module provides class 1 and class 2 WebDAV functionality for Apache. This extension to the HTTP protocol allows creating, moving, copying, and deleting resources and collections on a remote web server.
Mod_dav_fs – This module requires the service of mod_dav. It acts as a support module for mod_dav and provides access to resources located in the server’s file system. The formal name of this provider is file system. mod_dav back-end providers will be invoked by using the Dav directive:
Apxs – You need the apxs module if you are planning to install it from source.
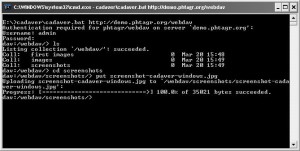
Cadaver – Client software to connect with your HTTP server for file sharing. It is available for both the Linux and windows.
Installing mod_dav & mod_dav_fs
If you have installed apache2 from rpm then both the mod_dav and mod_dav_fs are pre-installed and you just need to configure the mod_dav to activate it.
Source installation is not too hard and if you have installed your Apache via source then you have to build the mod_dav & mod_dav_fs module using apxs. On Apache Source is now included with the Apache tar and you can just locate it on /modules/dav/main/mod_dav.c & /modules/dav/fs/mod_dav_fs.c
- # cd httpd-2.x.x/modules/dav/main/
# apxs -cia mod_dav.c
To install the mod_dav_fs module
- # cd httpd-2.x.x/modules/dav/fs/
# apxs -cia mod_dav_fs.c
Configuring mod_dav
All you have to do is to add the following configuration inside the /etc/httpd/cond.d/ under file name “webdav.conf“. The reason we are putting our configuration file there is due to this gem in “/etc/httpd/conf/httpd.conf” (ie.. Include conf.d/*.conf )
<IfModule mod_dav.c>
LimitXMLRequestBody 131072
DavLockDB /var/dav/DavLock
Alias /dav “/home/fileshare”
<Directory /home/fileshare>
Dav On
Options +Indexes
IndexOptions FancyIndexing
AddDefaultCharset UTF-8
AuthType Basic
AuthName “WebDAV”
AuthUserFile /etc/httpd/conf/dav.passwd
Require valid-user
</Directory>
</IfModule>
LimitXMLRequestBody – Limit (in bytes) on maximum size of an XML-based request body. A value of 0 will disable any checking. Even you can restrict the shared folder to performe only read or write or deny delete etc by adding some more options like to a particular user or group.
<Location /home/fileshare>
DAV On
AllowOverride None
Options None
<Limit PUT POST DELETE PROPFIND PROPPATCH MKCOL COPY MOVE LOCK UNLOCK>
Require user greg
</Limit>
</Location>
This sets up the required WebDAV settings necessary to make it work properly. Here we have defined a number of things; one that is important to note is the location of the DavLockDB file (this must be writable by the user running Apache — usually Apache or nobody). The directory storing the lock file needs to be writable, so create a new directory specifically for this purpose:
- # mkdir -p /var/dav
- # chown nobody:nobody /srv/www/dav
- # chmod 755 /srv/www/dav
Finally, you need to create the password file for authentication. In the above example the password file was specified as /etc/httpd/conf/dav.passwd, so use htpasswd to create it:
- # htpasswd -c /etc/httpd/conf/dav.passwd [username]
If you have any trouble in using htpasswd, you can try the online password generator tools like http://www.htaccesstools.com/htpasswd-generator/ > Restart Apache to finish the setup.
- # service httpd restart
Try access the file share using the url and it will prompt you to enter the username and password:
- http://<server name/ip>/dav/
Installing cadaver
We cannot do any operation (ie..like copy/delete etc) via the web browser since it is not an ftp client. We need a client software which works very similar to the ftp command line tool to do the file operations. You can download the cadaver tool for Linux from http://www.webdav.org/cadaver/ and for windows http://www.phtagr.org/2009/04/01/cadaver-for-windows/ which will be very useful if you are trying to connect from your windows PC.

